What's new

#114 CCC

ratrog64

Well-known member
Oil Cooler

Working on the first of the two oil coolers I will use.

This really should have been done during my mock up stage but I guess better late then never.

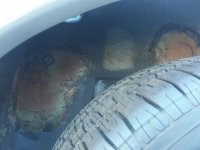
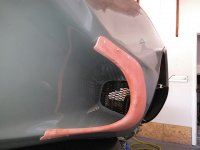
First I opened up the lower side scoop much more then it was. The scoop cover should be able to stuff some air through this new opening. I have some nice black mesh I will install on the back side of the opening so it looks finished and it keeps the raccoons from wanting to live in there.
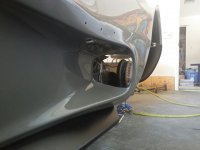
20170310_140802_resized.jpg

Next I scribed in some cardboard backer and taped everything off and prepped for some glass.
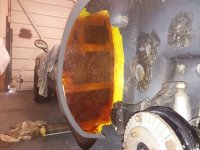
20170310_162158_resized.jpg

I laid in several layers of 1.5oz mat and gave it time to kick. While it was still very green I used my razor knife to cut around the perimeter so I could take it out.

After it finished kicking I removed all the cardboard and tape and ground it smooth. I added 2 more layers of 1.5oz mat to make it stout. I trimmed it up again while it was still green to make less work for myself.
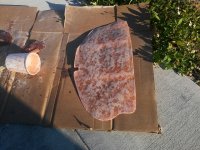
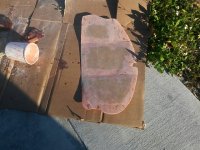
20170310_165821_resized.jpg

20170310_165832_resized.jpg

After fitting it back in place I marked some holes for a mesa cooler. I also marked are area on the back to be cut out.
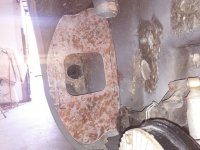
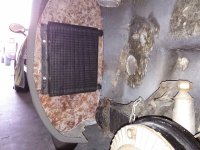
20170310_181359_resized.jpg

20170310_181746_resized.jpg

20170310_184906_resized.jpg

I will install a thermostatically controlled electric fan. on the back side of the cooler. The air that is stuffed in through the side scoop will have to pass through the cooler and exit into the wheel well.

Mesa coolers are made of steel so no worries about stones or anything kicking up from the tire.
 
Last edited:
ratrog64

Well-known member
Not the most productive weekend from a car point of view.

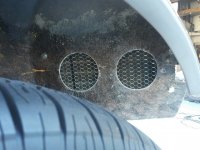
Got the mesh cut and fit in the side pod. Temporarily mounted the scoop to check the look, I like it.

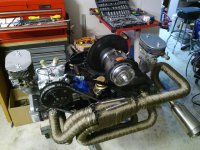
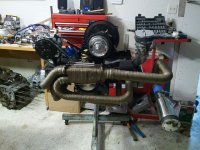
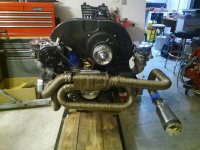
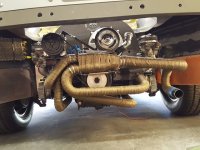
Also got the exhaust welded up and finished the header wrap.

20170311_104644_resized.jpg

20170311_192004_resized.jpg

20170311_191954_resized.jpg
 

ratrog64

Well-known member
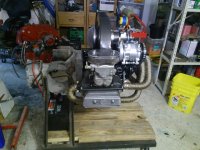
Got the motor mounted on the test run stand on Sunday.

Installed the stock style fan shroud since the chrome POS just didn't fit correctly. Now I know why it was given to me so long ago. It moves the alternator to far to the rear and the belt doesn't line up properly. Shame really, I liked how it looked. Stock is just so VW looking. I know the stock work better from a cooling point of view so in the long run its a better choice.

If I can free up some time this week I will try and get the motor running. I may still have to rebuild the carbs since they have been sitting for 2 years.

20170313_072416_resized.jpg

20170313_072444_resized.jpg
 
Last edited:

ratrog64

Well-known member
Thanks!

I put some old transaxle cases to good use several years back. I also have cut transaxles that you can just mount to the back of the motor when its sitting on the floor. This is better so I don't have the header wrap getting beat up on the floor.

Gives a nice stable platform especially if you are running in a cam shaft.
 

Peter

Active member
I'm not expecting a problem but ya never know. I'll come up with a solution if I have to!

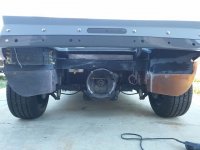
I like the looks of your exhaust from the rear!

Ahnendorp B.A.S. system with 2" SS tail pipes welded on. Now with 3" rolled edge trims to comply with regs..
 

ratrog64

Well-known member
2nd Oil Cooler

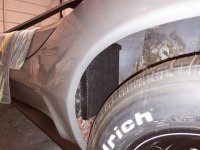
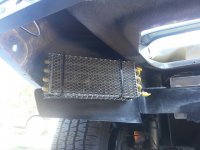
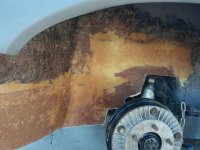
Worked on patching up my drivers side wheel well and mounted my 2nd oil cooler. This cooler will just be passive and use air from inside the wheel well without a fan. The mesh will help keep any road debris from hitting the cooler fins.

I will be extending the inner fender well and patching up some of the fiberglass in the engine compartment. I don't want it to look like a hacked up mess.

20170316_163524_resized.jpg

20170316_163506_resized.jpg

20170316_163454_resized.jpg
 

ratrog64

Well-known member
Sheet Material

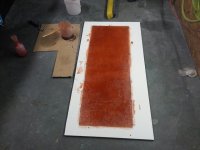
Laid up a small sheet of glass tonight. This will be used to help form up the wheel well and engine compartment. For those of you who haven't done it before, this is just 4 layers of 1.5oz mat laid up on a sheet of melamine that was waxed.

I'll be able to cut up pieces to form out the vertical surfaces. Vertical surfaces are messy to layup so having most of the big pieces made will reduce the mess and time laying up. It will just get glassed together in place.

20170316_201215_resized.jpg
 

ratrog64

Well-known member
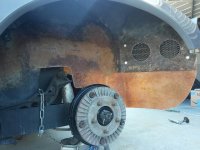
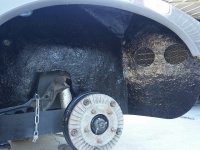
Got the rest of the wheel well filled in. Did a little painting as well (satin rustoleum). The gloss will go away as it dries.

Definitely makes for a nice finished look.

20170317_163434_resized.jpg

20170317_174712_resized.jpg

20170317_174731_resized.jpg
 
Last edited:

islandman

Member
What's with the chain on the suspension?


Yes matt black looks so much better under the arches, did something similar on mine and it makes all the photos look better *thumbs up*
 

ratrog64

Well-known member
What's with the chain on the suspension?


Yes matt black looks so much better under the arches, did something similar on mine and it makes all the photos look better *thumbs up*

The chain is to keep the suspension compressed during the mock up / build so I know how the car will sit once the motor is in. Nothing looks worse then the ass of the car sitting way up and the wheels turned under when the motor is out. I wouldn't even want to work on the car looking like that! *na-na-na*
 

ratrog64

Well-known member
Pass Side

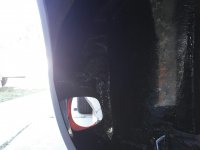
Passenger side wheel well glassed in.

I also trimmed up the front of the engine compartment.

I still need to decide what I want to do at the front of the engine compartment. I need to put the motor in before I do any thing to be sure how far to go.

I know it doesn't look like much at this point, but I am very happy I made the decision to do this. I think it is going to really frame out the motor and add to the finished look of the car. Especially since I have the rear grills that you will be able to see into the engine compartment.

20170318_172230_resized.jpg

20170318_182548_resized.jpg

20170318_194241_resized.jpg

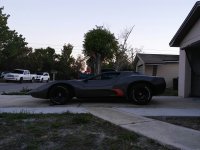
I scrubbed the tires again and gave the car a good wipe down after a productive day. Then I sat and stared for about an hour! *hee-hee-hee**insane*
 
Last edited:

ratrog64

Well-known member
Test Fit

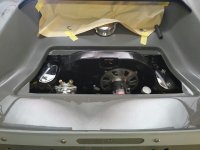
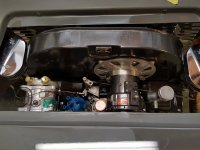
Just did a test fit today to make sure everything was going to work since the new wheel wells.

I installed a louvered rear stainless firewall. Trimmed it up a bit and it worked out real nice. Think I have had it since the early 80's from a 64 bug. Good to put it to some use. I also mounted a remote oil filter on the drivers side below the oil cooler (not pictured).

Everything seemed to fit ok. The top of the fan shroud just about touches the engine cover. I'd also like to be able to use bigger air filters on the carbs, not possible currently. I think I'll start working on my redesign sooner then later.

I don't think the photos do it justice, the motor looked pretty awesome in there. I think the average Joe (none VW Joe) will have no idea what kind of motor it is. The AC compressor really adds something to the look!

20170319_114515.jpg

20170319_111658_resized.jpg

20170319_114537.jpg

I kind of forgot to take many photos today while I was working.
 
Last edited:

ratrog64

Well-known member
Lift Arms

Put a little time in on my car on Sunday. Been focused on Ray's car and house projects the past few weekends.

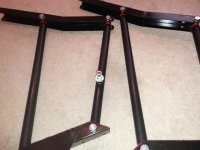
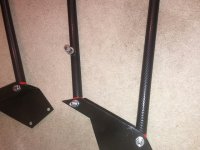
Finally got my carbon fiber lift arms put together. Maybe I'll get my top mounted in the next few days.

20170501_180151_resized.jpg

20170501_162234_resized.jpg
 

ratrog64

Well-known member
Fake News! Fake News!

Did I say carbon fiber?

I meant to say carbon fiber wrap *laugh*

I didn't know what else to do, they had been previously sprayed with chrome in a can. Since I have a few other carbon fiber wrapped do dads in the car, It will kind of work together.

They actually turned out pretty good. I'd do it again.
 

ratrog64

Well-known member
Canopy

Been a long time coming!

I had some extra help today so I was able to get the canopy attached to the opener arms.
One side was a perfect fit and the other took some adjusting. This is the first time this canopy has been attached to these arms. If you remember, this canopy was from a different car.

Now I can start tying up the remaining interior and wiring! Feels like I'm getting close, and getting the canopy installed is a milestone. *thumbs up*

20170502_183319_resized.jpg

20170502_183306_resized.jpg
 

ratrog64

Well-known member
All my time lately on this car has been spent making all the electrical work before I get into the final assemble. Lights, camera, switches etc..... just about finished and all doing what the should be. It continues to blow my mind just how many hours go into the wiring of a car project. I'll have 60 ++ hours in the wiring alone on this car by the time I am done. Now granted, some of it has been spent just trying to figure out what I want and how I want it to work. Most of that will go quicker the next time around. I think I have final placement of everything now so I should be able to wrap up the last test or 2 this week. My turn signal circuit is the next important test. Once the dash and console is in I don't want to have to go down under for any reason!

The canopy is working again. I got a chance to test it on Friday past. The driver side ram was seeping oil when I had the top up and supported with a 2x4. I wanted to get the pump running again before I took the ram off to be rebuilt. Just as I suspected, the cause of the seeping was air in the line. Once I ran the top up and down the ram stopped seeping. *thumbs up* You forget just how freaking cool the canopy operation is until you experience it again. *rock on**rock on**rock on*
 
Last edited:
Top